=Page=
greenshot000061.png_linkproduct_setup_manufactured_product_generalgreenshot000054.png_linkproduct_setup_manufactured_product_standard_attributesgreenshot000055.png_linkproduct_setup_manufactured_product_pricinggreenshot000056.png_linkproduct_setup_manufactured_product_custom_attributesgreenshot000067.png_linkproduct_setup_manufactured_product_artworkgreenshot000058.png_linkproduct_setup_manufactured_product_images_and_documentsgreenshot000059.png_linkproduct_setup_manufactured_product_inventorygreenshot000060.png_linkproduct_setup_manufactured_product_customer_website
Artwork Tab
The first thing you need to do on the artwork tab is decide what exactly the user can do with the online_designer
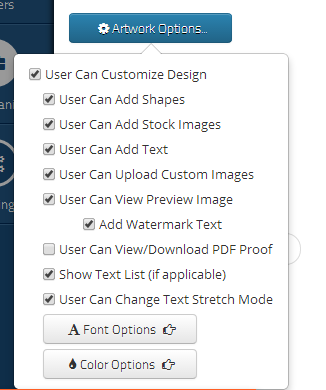
The two most important ones are User can Preview Images and **User can View/Download PDF Proof.
The Preview Images is a full screen image of the artwork at a higher resolution, but not high enough to print from. The PDF proof is a 600 DPI printable file, and most businesses leave this box unchecked.
Every Product can have multiple pieces of artwork. The two ways to add artwork are to create them new or copy them from the Library. Any piece of published artwork can be copied over.
For more information on creating pieces of artwork and how to use the online_designer, check the online_designer Page.
One of the key elements is the upload tool, where you can upload the background image that one of your designers generally created. Make sure you leave anything that is customizable blank. You can create new images over the ones you upload, but you cannot actually edit them once they have been uploaded.